Build a multi-channel Digital Audio Workstation (DAW)
Build a multi-channel Digital Audio Workstation (DAW)
When you think of digital audio workstations, you might imagine a massive computer with a gigantic mixing console or a MacBook connected to a large external sound card. But is all of that really necessary? What if you could build an ultra-compact system that’s also much more affordable? Why not use a Raspberry Pi as the foundation for such a setup?
Even though the Pi 5 can’t match the computing power of a full-sized desktop PC or a high-end MacBook, you might not always need that level of performance. Depending on your specific project, a Raspberry Pi 5 with open-source software like Audacity might be more than sufficient. In this guide, we’ll show you how to create a multichannel DAW based on the Raspberry Pi.
Please note that this guide is provided “as is.” We cannot guarantee that it will work without modifications on future versions of Raspberry Pi OS or Audacity. You may need to check the documentation for these software packages and make adjustments accordingly. We do not offer individual support for this setup. However, feel free to ask questions in our community area.
Hardware
Since we want to work with more than two audio channels, the hardware will be based on our 8-channel sound interface:
- Raspberry Pi 5 – while the 4GB version is sufficient for most cases, the 8GB or 16GB version may be better for complex projects.
- HiFiBerry DAC8x
- HiFiBerry ADC8x
If you don’t need multichannel capabilities, our other sound cards, such as the DAC2 ADC Pro or the Studio DAC/ADC, might also be a good fit for your project.
Base Configuration
We recommend installing the full version of Raspberry Pi OS, as it includes a graphical user interface required for running audio software. You may need to configure the sound interface properly—refer to our configuration guide for details.
Once the base setup is complete, verify that the sound card is correctly recognized using the following commands:
aplay -l
arecord -l
These commands should list the HiFiBerry sound card for both playback and recording.
Installing and Configuring Audacity
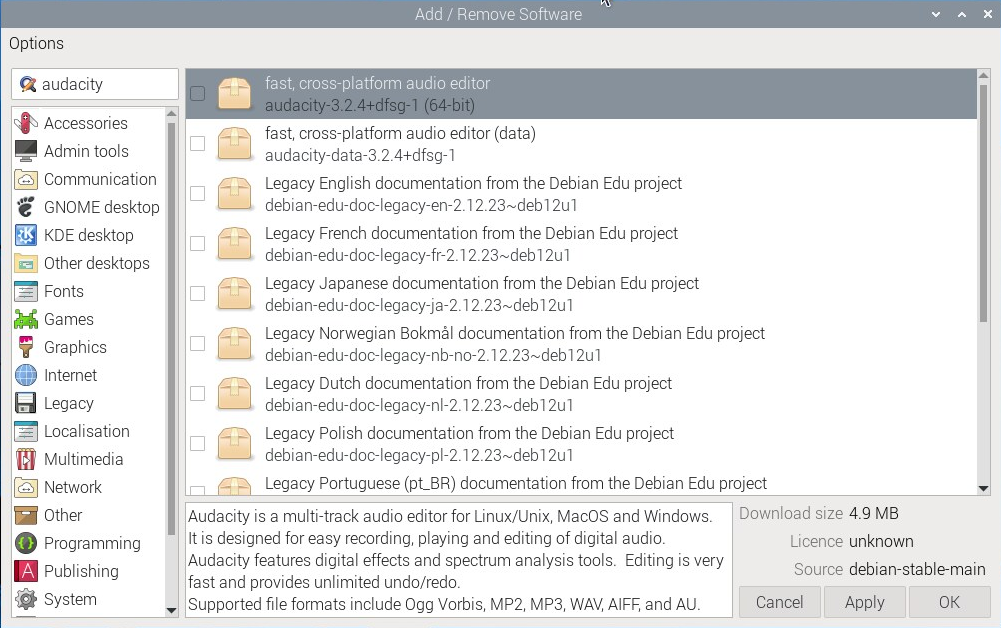
First, click on the menu button in the top left corner and open the “Add/Remove Software” tool. Search for “Audacity” and install it:
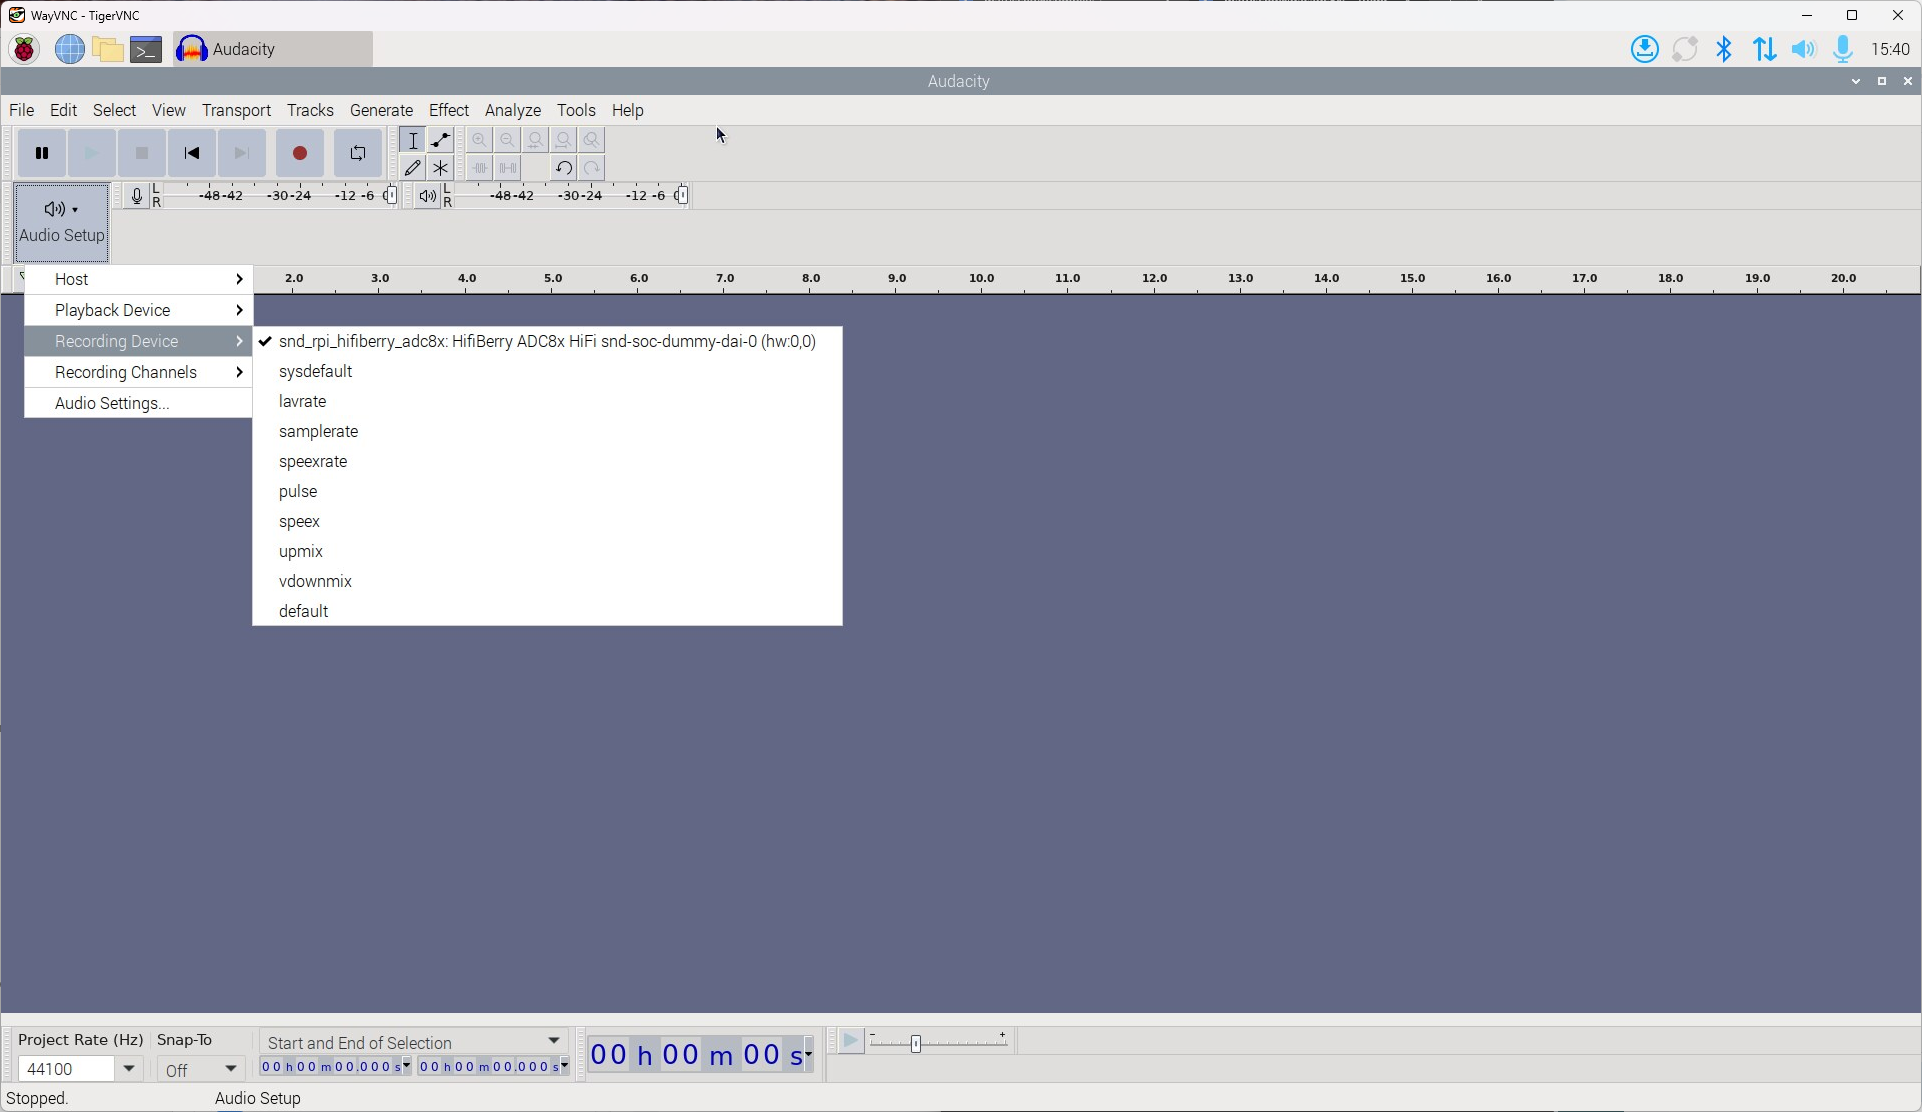
After installation, configure Audacity to use the HiFiBerry DAC and ADC. You can do this in the “Audio Setup” menu. We recommend selecting hw:0,0 (the ID might differ if you haven’t disabled the onboard sound). This setting allows direct access to the sound card hardware without any audio middleware.
However, to ensure proper functionality, you may need to disable any installed audio middleware, such as PipeWire or PulseAudio.
Using Audacity
The first thing to try is the record button.
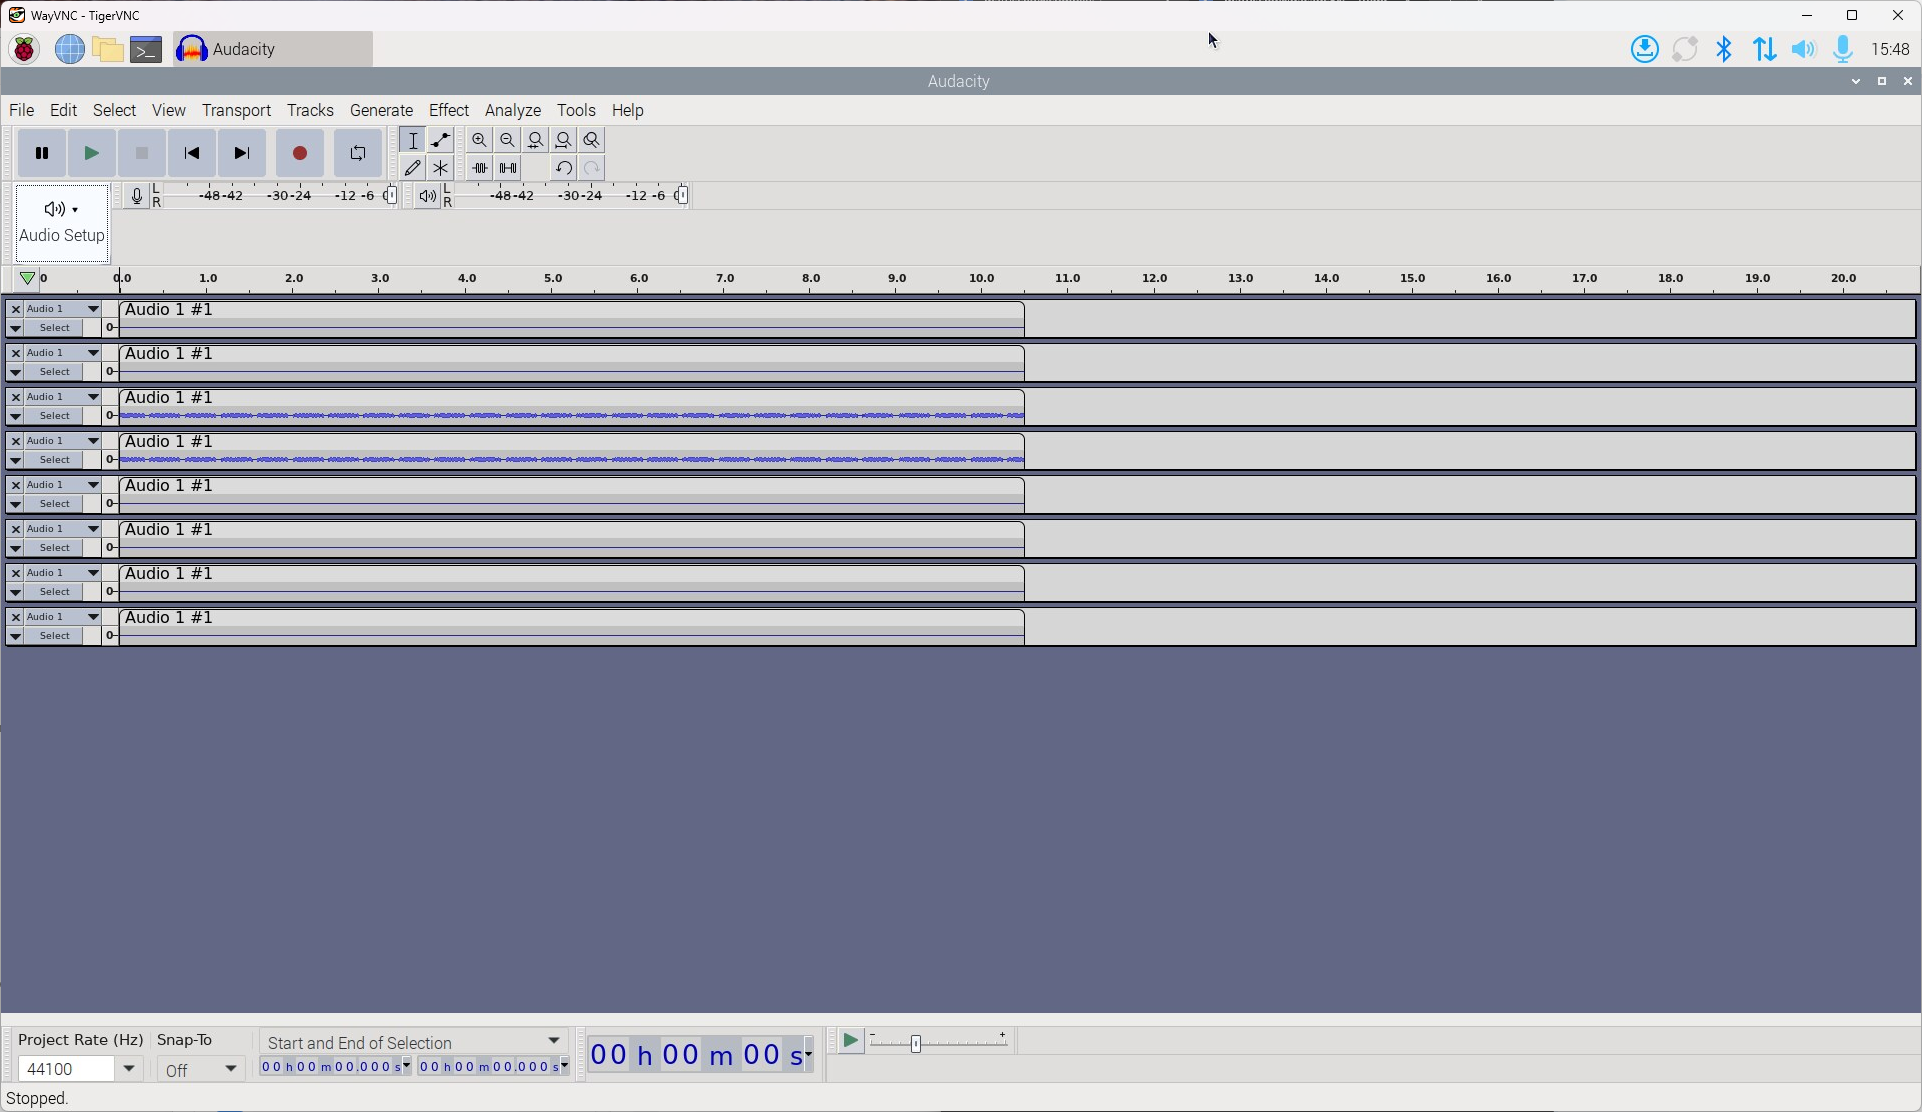
You should now see Audacity recording all 8 channels. Press stop, rewind to the beginning of the track, and press play. You should hear your recording.
The next step is to explore Audacity further and start working on your project. There’s no fixed workflow—you can experiment, read the documentation, and explore the various effects and filters to see what works best for you. This is your creative space!
Limitations
A compact setup like this does come with some limitations:
- The limited processing power and features of Audacity may not be suitable for complex projects.
- The 3.5mm phone jacks are relatively small, so you may need adapter cables.
- The ADC8x isn’t designed for low-voltage sources like microphones. If you plan to use microphones, you’ll need external preamplifiers.